Tools for the Electronic Hobbyist
|
|||||||
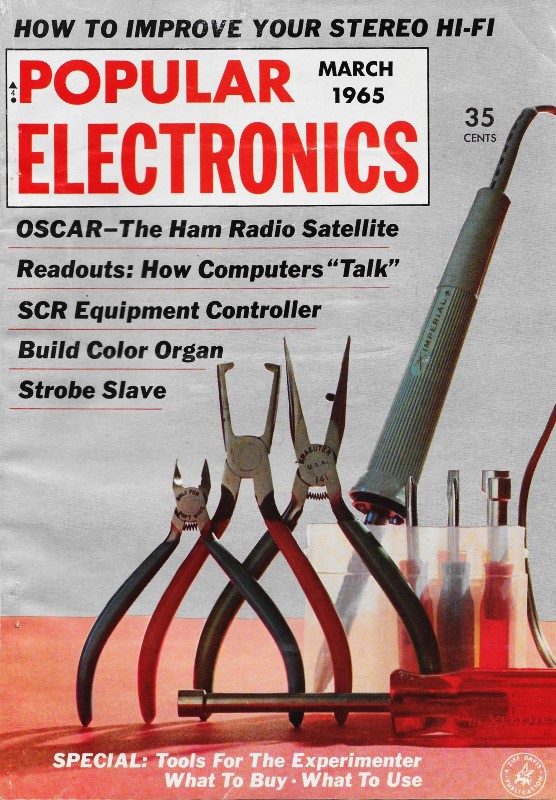
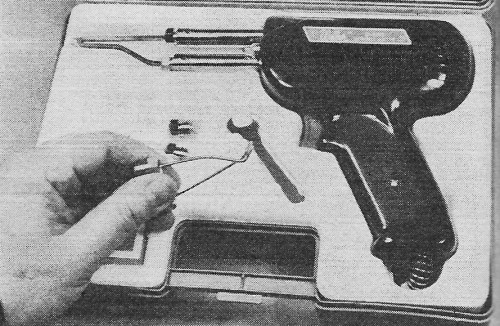
Although the article's title specifies "electronic hobbyist," the advice applies equally well to students and professional technicians and engineers. A few of the tools are no longer available from the original manufacturers, but modern equivalents - often of better design and quality - are available. If you are nostalgic for the originals, though, you can always look for them on eBay; there's not much you cannot find there if you wait long enough. To show how much times have changed, get a load of (pun intended) that pistol-shaped soldering gun. Can you imagine the mayhem that would ensue if it showed up in a high school electronics lab today? For that matter, is a classic Weller soldering gun allowed? Can you even say "soldering gun?" A wide variety of tools are available to help you do the job right.
By Don Lancaster The success or failure of every piece of electronic equipment you build depends on the tools you have and how you use them. Beginner or old-timer, professional technician or experimenter, you need certain tools, each of which requires an investment. An unused tool is a waste of money. A missing tool means lost time and occasionally a botched-up job. What are the essential tools for electronics work? Who makes them and how much do they cost? There are four categories of tools we should consider: (1) basic tools absolutely essential for the beginner; (2) "luxury" tools for the beginner, but otherwise generally useful and convenient; (3) special tools required for serious home-brew work, magazine construction projects, equipment modifications, custom audio work, etc.; and (4) the "there must be an easier way" tools that greatly simplify work and improve results, but are not really necessary. Suppose you're just getting started in electronics. Table 1 on page 68 lists the essential tools you will need. This selection of tools will ultimately become the set around which your whole collection is built.
Table 1: Essential Tools for the Beginner Soldering Tools. Foremost is something to solder with. Solder is the glue of electronics. Without it, you'd be as bad off as if you tried to build a house without nails. You must choose between an iron or a gun. A soldering iron is low in cost, holds a fairly uniform temperature, and in general enables you to do neater work, particularly on connectors and printed circuits. On the other hand, a gun is much more convenient. It heats and cools quickly and needs no stand. It lights its way into dark corners. Some models provide dual heat. The gun is much better suited for installation work, to get inside speaker enclosures and television sets that can be serviced in the living room. Eventually you'll want both a gun and at least one iron (two if you do heavy work). The rule on the initial choice is this: If you are going to do most of your work on a bench, or if you are somewhat restricted financially, get an iron. If you are going to work on a kitchen table, get a gun. A good choice to start out with in a gun is something in the 100-watt range such as the Weller Model 8200 which offers a dual-heat capacity of 100/140 watts. The best choice in an iron is a handle and cord assembly with a removable tip. Tips with heats of 37 1/2 watts and 47 1/2 watts are available (among others) and will prove eminently practical for general-purpose work. Less wattage is needed in an iron for the same soldering job because the thermal mass of the tip stores heat better than the small gun tip.
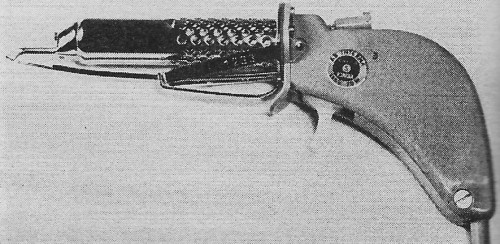
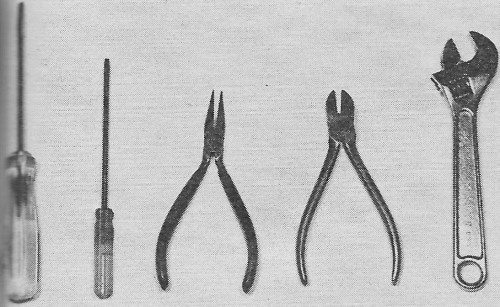
The jeweler's pliers are cheaper, have soft cushion-grip vinyl handles, and are easier to use, especially in tight areas and on printed circuits. Of course, you can't bend 1/8" steel or cut bolts with this size tool, but the small size is otherwise perfect for all electronic work. You'll need two screwdrivers, a large one with a 3/16" blade for general assembly work, and a small one with a 1/8" blade for knobs and smaller hardware. Two types of screwdriver blades are the cabinet tip (straight) and keystone tip (keystone shaped). The cabinet tip is much better suited for electronic work, and is a bit less common than the keystone tip. Watch for it when you buy. Again, avoid the bargain basement screwdrivers. There is a definite relationship between the quality of your tools and the quality of the work you do. Further, cheap screwdrivers tend to slip and mar cabinets and finished panels, and have caused more than one gouged finger. A quality screwdriver costs 88 cents (Proto, Xcelite, Craftsman, etc.) and is well worth it.
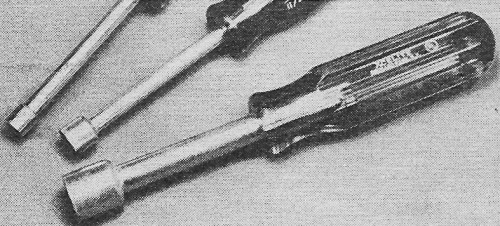
Table 2: "Luxury" Tools for the Beginner The final basic tool is a 6" adjustable wrench. This tool enables you to remove and fasten everything from a sheet metal screw to a volume control nut. You get a lead and bracket bending tool, a small vise, and a changer mechanism repair tool free in the bargain. Make sure your wrench is drop-forged; any other type just won't last. The chrome-colored variety is a bit more expensive than a black wrench, but has a better "feel." This minimum collection will get you started. If you only do occasional electronic work, it may be all you will ever need. But if you're like most electronic "types," you'll start adding "luxury" tools to your basic collection. These tools are not absolutely necessary, but are extremely helpful. Some of them are listed in Table 2 (on page 70). Tables 1 and 2 together will give you a good, well-rounded, basic electronic tool set. Additional Tools. The first addition should be a 1/4" nut-driver, either a pocket - or full-sized one. Virtually every radio, television set, and phonograph is held together with sheet metal screws that have a 1/4" head. Also, all of the #4 hardware and almost all of the #6 hardware use nuts that are 1/4" across the flats. As these are the two most common electronic hardware sizes, the 1/4" nut-driver is a most useful tool. You can buy nut-drivers individually or in sets (Xcelite PS120, etc.). You may want a wire stripper of the low-cost variety. They do neater stripping than dikes and there is much less of a tendency to nick the wire. They are also much easier on the hands than dikes. The strippers with vinyl handles are a better choice at twice the cost of the inexpensive variety. There are also "automatic" strippers available which may be a good investment if you do considerable work in electronics.
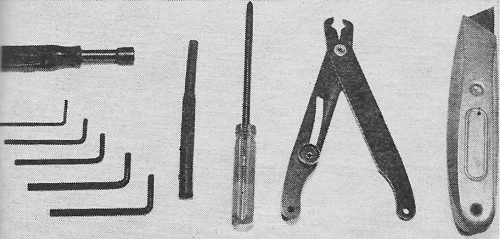
A nut starter is usually provided free with your first kit from at least one kit manufacturer (Heath). This 25-cent piece of plastic tubing can save you hours of frustration trying to get nuts on elusive #4 and #6 screws in tight locations. A Phillips screwdriver should be bought when you need it. A #2 or #3 tip is best suited for the screws occasionally found on some consumer electronic items and certain car radios. These screws are not too common, but when encountered, a Phillips driver must be used. A pair of pliers of either the low-cost slip-joint "gas" plier variety or else the multiple slip-joint "water pump" variety makes a good addition. These are used for positioning, holding, bending, and clamping. They also will do heavy cutting (busbar, appliance wire, etc.). The water pump variety (Channellock, etc.) at $2.60 or so is much more expensive than the 69-cent pair of gas pliers, but is more useful in some instances. You will probably never run across an Allen head screw until you try to take apart your first piece of military surplus gear or do an industrial service job. Then you will find dozens of the little monsters staring at you. At this point there is only one answer - go buy a quality set of Allen wrenches. Contrary to popular belief, a file tang just won't work! The bargain basement Allen wrench sets are worthless on three counts: They are not hardened, they are not small enough, and the sloppy plating job makes them murder on the screw heads themselves. Be sure your set is hardened or tempered steel, and not the plated variety.
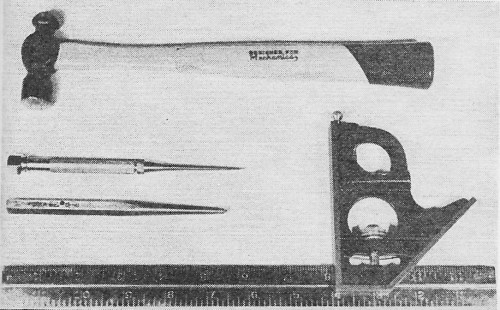
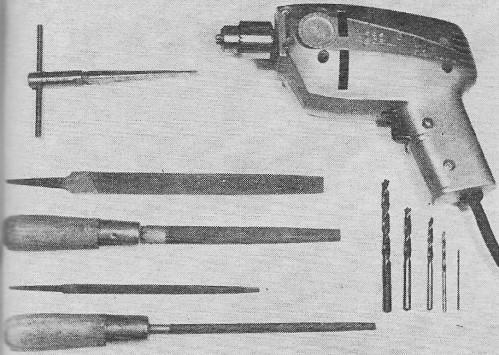
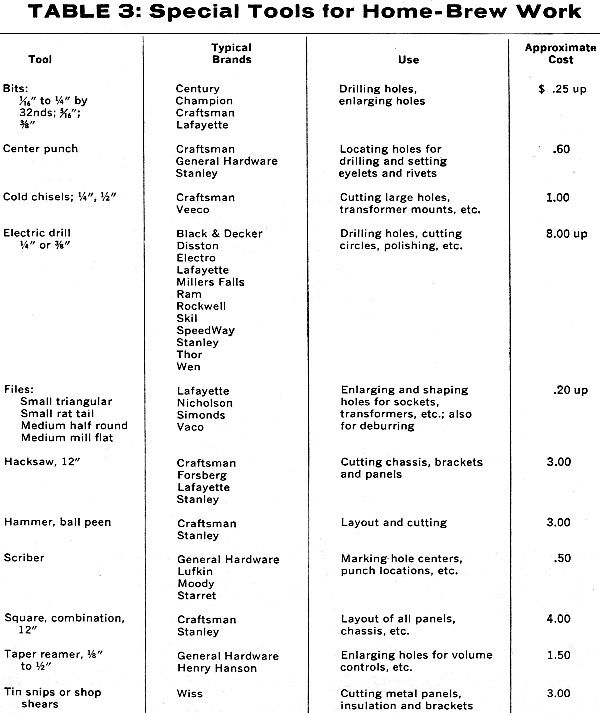
Table 3: Special Tools for Home-Brew Work Tools for Home-Brew Work. You now have a rather complete collection of electronic tools, well suited to most experimental work, almost all service work, and certainly all kit building. But you still can't build anything of your own! You have no way of cutting and laying out chassis and panels, or of handling cases and cabinets. Table 3 (on page 88) shows the tools you'll need if you decide to do serious home-brew work or try to duplicate magazine construction projects. Here the cost of your tool collection will go up considerably. The best rule to follow before you buy is to wait until you have a definite need for each item and are certain that you will need the same tool again in the future. A basic set of layout tools consists of a combination square, a scriber, a ball peen hammer, and a center punch. A bit of common sense at this point may save you some money. If you are only occasionally going to be doing construction work, then by all means get the low-cost tools. But if you're going to do any serious work, get the best-quality tools you possibly can. To cut your brackets, panels, and chassis, you will need two more tools, a 12" hacksaw with a fine-tooth blade, and a pair of shears. You have a choice between conventional "tin snips" or the more expensive double-action aircraft shears. Now to put the holes in. You must have an electric drill if you are at all serious. Otherwise you'll be wasting your time. At least a 1/4" - or better yet - a 3/8" chuck should be chosen. The only difference between a $15 and a $30 drill is the quality of the bearings (bushings vs. ball bearings) and the ruggedness and "burn-out-proofness" of the motor. For occasional work, choose the cheaper models. For professional or production work, get the finest drill you can buy (Skil, Black and Decker, etc.). It will pay for itself many times over.
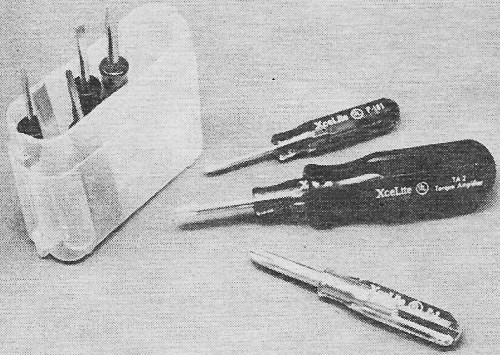
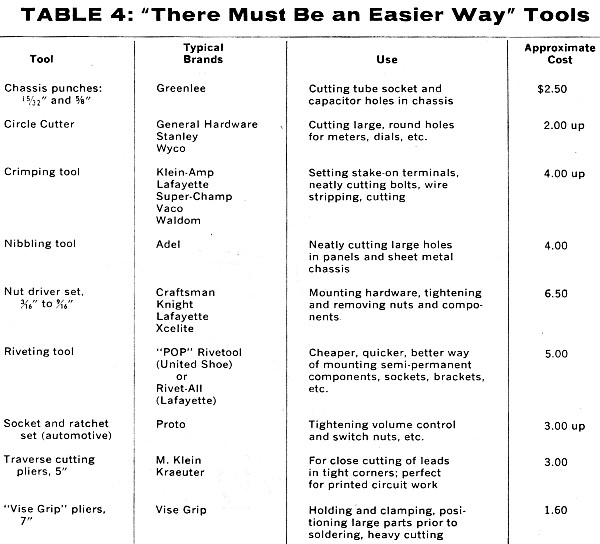
Wire strippers are handy to have. Unit at left is "automatic" type - good if you do a lot of wiring. Inexpensive stripper (right) will also serve. A drill index with some drills is next. Here there should be no compromise. Even if you are only going to drill one hole, get a quality drill. The bargain basement drills dull quickly, cut a ragged hole, and walk all over the place. The same goes for files. Stick to the quality brands (Nicholson, etc.). You'll need these for enlarging holes, cutting square holes for sockets and transformers, and finishing panel edges. A basic set consists of a 1/4" "rat-tail" file, a small triangular one, a large half round, and a large flat file. Another important rule: When a file gets dull (not clogged, but just plain dull), do one of two things with it - either use it as a paint stirrer, or throw it away. But don't try to file with it. You'll be wasting your time. Two cold chisels and a taper reamer for enlarging holes complete the basic construction tools you'll need. The chisels are fine for transformer holes. The reamer is required to get a 1/4" hole large enough to accommodate a volume control or a pilot light. "Easier Way" Tools. Maybe you already have most of the tools listed in Tables 1, 2, and 3, and are considering getting the rest. But Table 4 lists a new breed of tools. They are the "there must be an easier way" tools that make child's play out of some rather boring and hard jobs, or else improve results and quality considerably. Or maybe they just make life easier. You may want to add some of these nonessential tools to your collection. Foremost on this list is a pair of locking (vise grip) pliers. This tool is just plain wonderful. It serves as a third hand, a vise, cuts bolts, wire, and rod, positions parts, and holds small parts for soldering. Next is a crimping ("Champ") tool. Outside of its obvious use for crimping solderless connectors and terminals, it makes a fine wire stripper, and a bolt cutter that does not damage the threads while cutting. It also cuts wire along with its other functions. A nibbling tool has to be seen to be appreciated. This little known tool neatly chomps its way through a chassis to provide a smooth-edged hole. It takes a small bite each time. The little bites all line up to give any size hole you want in any shape - rectangular, round, or free form. Nibbling one power transformer hole will pay for the tool.
Table 4: "There Must Be an Easier Way" Tools One or two chassis punches in the common 1 5/32" and 5/8" sizes makes tube socket and capacitor mounting hole punching a snap. Another little known tool is the traverse cutting plier. This is a cutting plier that looks like a pair of "needle noses," but cuts clear out at the tip (as a dog would bite, not on the side as the cutters on some needle-nose combinations). There is nothing like this tool for close cropping of printed circuit leads, and tight, "down under" cutting of any type. The cutting plier neatly cuts off leads that a pair of dikes can't get near. A final special tool is a relatively new item. Five dollars will get you a "POP" Rivetool that will enable you to rivet electronic assemblies together. This is done from one side at the squeeze of a handle. The cost is less than that of standard hardware. You can use a Rivetool in blind or nearly blind locations where a nut cannot be backed up. The rivets will not shake loose, but they can be drilled out easily if you have to remove them. And you can fasten two thin sheets of metal together where a sheet metal screw will not hold. The resulting appearance is "professional." Of course there are other tools that could be mentioned, but they are not too widely used. What we have listed here should represent a good setup for anyone in electronics.
Posted March 13, 2018 |
|||||||